
A misaligned rail compromises the entire structure, even if the finish seems perfect. A drywall partition does not tolerate improvisation well: every neglected step increases the risk of cracks, poor insulation, or deformation.
Invisible errors during assembly often reveal themselves too late, during the first uses or when it’s time to paint. Yet, a few methodical principles and precise actions are enough to ensure strength, comfort, and durability.
You may also like : How to Choose a Scooter Perfectly Suited for Small Statures: Guide and Tips
What to know before starting the installation of a drywall partition
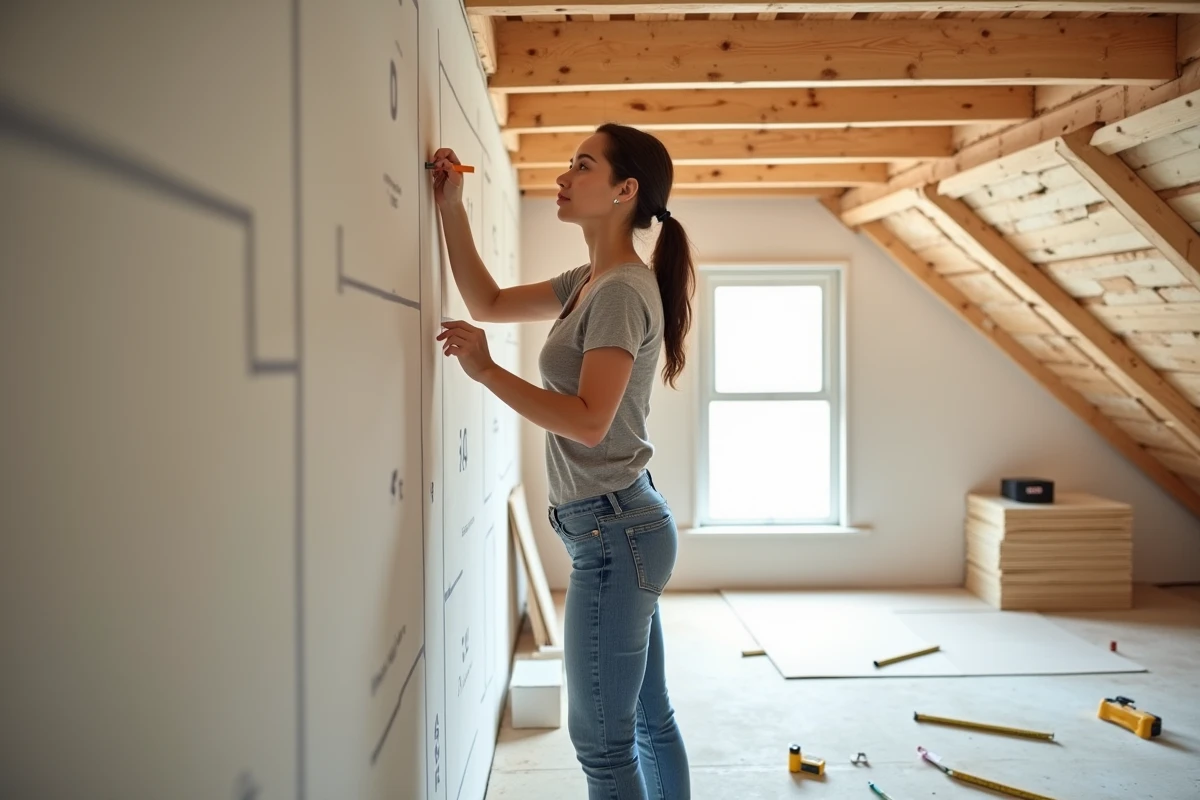
Before tackling the drywall installation, the first question to ask is about examining the site. Every partition project begins with a precise measurement, from floor to ceiling, to avoid any approximation. The quality of the support, the ceiling height, potential humidity, everything matters in the choice of materials and installation methods. Checking the metal framework that will support the partition already guarantees its strength for the years to come.
The type of drywall depends on the purpose of the room: humid spaces require water-resistant boards designed to withstand steam. Prioritizing an effective insulation material like fiberglass or composite panels significantly improves thermal acoustic insulation and final comfort.
You may also like : Tips and Tricks for a Fulfilling Family Life Every Day
A well-thought-out preparation greatly limits future problems. Measurements must be taken scrupulously, just like the alignment of the rails and studs. The markers and advice from Les Embellies Déco’s DIY guide deserve careful reading to approach each step with confidence. Once the list of tools is ready, including a suitable screwdriver, laser level, special saw, and personal protective equipment, it’s time to embark on the assembly. Success depends on the precision of the installation and the rigor in making the joints.
What are the essential steps to assemble a drywall partition by yourself?
The drywall installation is organized into a series of steps that should not be overlooked. The first is to accurately mark the future boundaries of the partition: using a laser level to delineate on the floor and ceiling minimizes the risk of error to a strict minimum. Metal rails fixed securely, studs added every 60 cm, the framework takes shape properly.
Before closing it up, plan for the electrical conduit passage or other necessary installations. Insulation, discreetly slipped into the structure, significantly improves comfort while reducing sound transmission.
The attachment of the boards is done using suitable screws, placed slightly recessed to prepare for clean finishes. The joints are then treated with joint compound and tape. It is preferable to respect the drying time before sanding to achieve a truly smooth surface.
To carry out the project from start to finish without unpleasant surprises, a list of tools is essential: an effective screwdriver, a sharp cutter, a drywall lift, and a jab saw. The entire project gains in strength and aesthetics as long as each step of the drywall installation is carried out diligently, without shortcuts.
Pro tips and mistakes to avoid for a flawless result
Precision and anticipation: the foundations of a successful drywall partition
The secret to a durable drywall partition is a well-aligned metal structure. Before each attachment, absolutely check the rails and studs with a laser level. Mark the points with a pencil to work without hesitation. Place your insulation between the studs, then start with the boards. If there is a flatness gap, correct it promptly rather than letting it slide during the finishing.
Here are some essential reflexes to avoid pitfalls during a drywall project:
- Always leave a gap of about 1 cm under the ceiling to counteract micro-movements of the structure.
- Carefully handle the cuts: each board must be neatly edged to facilitate assembly and limit the appearance of defects after finishing.
- Anticipate the position of electrical conduits and boxes, so you don’t have to drill or adapt urgently once the partition is closed.
For impeccable interior partitions, never neglect the joints. Use reinforced tape in the corners, and apply the joint compound in two passes to achieve the desired plumb and smoothness. Plan for a fastening every 30 cm with special drywall screws, a true guarantee of durability.
In areas where humidity may settle, choose water-resistant boards. Selecting the right rails, suitable screws, and compatible joint compound ensures a stable and reliable assembly over time. Attention to every detail, from assembly to finishing, makes the difference between an improvised project and a partition built to last. A well-designed partition today is a space that will remain solid tomorrow.